Friday, September 8, 2017

Mozzarella Stuffed Meatball Sliders

Hello my Hy-Vee friends!

It's football season once again! Sure, I guess that means football…but more importantly, it means tailgating and that means delicious food! And sure, there will always be that guy hogging the grill, spending way too much time flipping burgers and turning brats.

Well forget him! This is a perfect place and time to focus on crock pots. Crock pots will keep your food nice and toasty for however long you are tailgating. Sloppy Joes? Not my thing but sure. Pulled pork? Perfect. Shrimp and corn chowder? Excellent idea. One of my favorites is mozzarella stuffed meatball sliders. These meat balls have the wonderful surprise of oooey gooey cheese in the middle and more important for our purpose, they hold up beautifully in a crock pot.
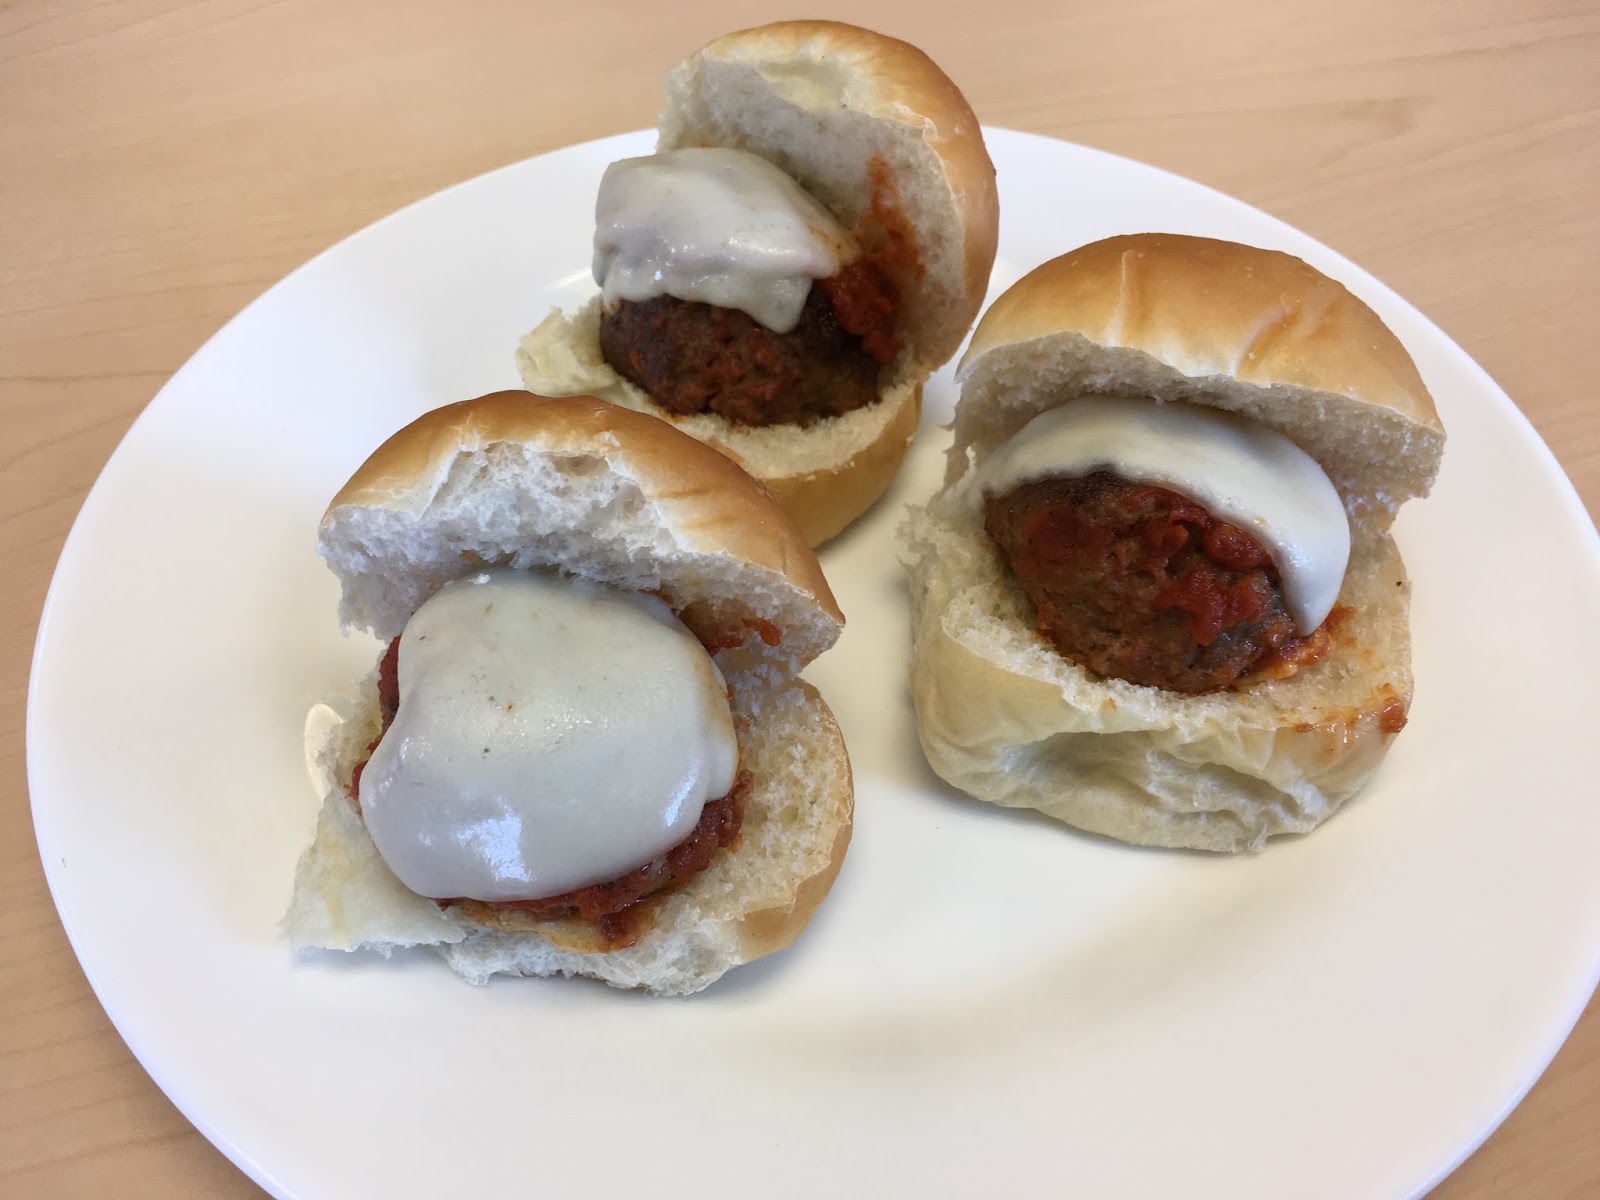

Mozzarella Stuffed Meatball Sliders

All you need:
2 tablespoons olive oil, divided
1 pound ground beef
1 pound ground pork
1/4 cup Romano cheese
1/2 cup Italian bread crumbs
2 eggs
1 teaspoon salt
1/2 teaspoon pepper
4 cloves garlic, minced
16 cubes mozzarella cheese
1 24 ounce jar marinara sauce
1/2 cup dry red wine (optional)
8 slices provolone cheese, thinly sliced
16 cocktail buns

All you do:
1. Combine ground beef, ground pork, Romano cheese, bread crumbs, egg, salt, pepper and garlic in a large bowl. Mix to thoroughly combine all ingredients.
2. Shape meatball mixture into 16 balls, making an indent in the middle of each ball and pushing a piece of mozzarella cheese into the middle. Seal the meat around the cheese completely.
3. Place half the meatballs into the hot skillet and saute until golden brown on one side, about 2-3 minutes. Flip the meatballs and brown on the other side. Meatballs do not need to cook all the way through. Remove to a plate. Re-heat the pan with the remaining oil and cook the second half of the meatballs. Return all the meatballs to the skillet.
4. Turn the heat down to medium-low and pour the marinara sauce (and red wine if using) into the skillet. Place a lid on top and simmer for 15 minutes, spooning the marinara sauce over the meatballs every so often to keep them moist.
5. Cut each slice of provolone cheese in half. Place a cooked meatball onto a bun and top with the provolone cheese.
6. Enjoy!

Whomever you cheer for, eat some sliders and as always, Praise the Lard!

-Chef Alex

Friday, September 1, 2017

Souvlaki with Tzatziki

Hello my Hy-Vee friends!

Whether we like it or not, summer is coming to an end. I know there are many diehards out there that will continue to grill until the first snow falls. I also know an equal amount of you that are burned out on grilling and are ready to retire until the spring.

For which ever camp you fall into, I would like you to put down the burgers and brats and think outside the box. The Japanese, Koreans, Israelis, Turks, Moroccans and many others are all masters of the grill. But today we focus on Greece. In this case, I want you think of a Greek dish known as souvlaki. Beautifully marbled pork shoulder is bathed in red wine, lemon juice and Greek spices and then grilled. Served with a simple but equally tasty yogurt sauce called tzatziki and you will be transported to the Islands of Greece.


Souvlaki with Tzatziki

All you need for the tzatziki:
2 cups plain Greek yogurt
4 cloves garlic, minced
1 teaspoon salt
2 cucumbers, peeled, seeded and grated on large holes of grater
1/2 teaspoon freshly ground black pepper
2 teaspoons olive oil
1 teaspoon dried dill
1 tablespoon lemon juice

All you need for the souvlaki:
2 pounds boneless pork shoulder, cut into 1 inch cubes
1/4 cup olive oil
1/4 cup red wine
2 lemons, juiced
1 tablespoon dried mint
1 tablespoon dried oregano
4 cloves of garlic, smashed and minced finely
Salt and freshly ground black pepper

All you do for tzatziki:
1. In a large bowl, add all ingredients. Mix until combined.

All you do for souvlaki:
1. In a large bowl, add the meat and season with salt and pepper. Whisk together the remaining ingredients and pour over meat.
2. Toss to combine and marinate for 3 to 4 hours.
3. Drain the pork and thread onto skewers. Cook the kebabs until nicely browned and cooked through.
4. Serve with pita and tzatziki.
5. Enjoy!

Eat some Greek tonight and as always, Praise the Lard!

-Chef Alex

Friday, August 18, 2017

Chile Verde Stew


Hello my Hy-Vee friends! I am excited to report that it is Hatch Chile season here at your West Lakes Hy-Vee. Hatches are green, beautiful, tasty chiles grown in Hatch, New Mexico. Once the chiles are roasted and peeled (see note at the bottom of my recipe), the uses for Hatch chiles are endless. Some of my favorite uses include topping them on white cheddar burgers, pizza, stuffing them with cheese and deep drying them (aka chile rellenos) and making chile verde sauce (see recipe below) which can be used to pour over enchiladas, burritos, french fries, rice, you name it. In my favorite scenario, I take pork butt and simmer it with the chile verde sauce to make a delicious green chile stew. Top that with some shredded Henning's Hatch Chile Pepper Cheese and a touch of sour cream and it puts me in hatch heaven.


Chile Verde (Green Pork Chile Stew)

All you need for the stew:
2 tablespoons vegetable oil
2 pounds pork butt (shoulder), small dice
Salt and pepper
Chile verde sauce (see below)
1 to 2 russet potatoes, small dice (optional)
Shredded Hatch Green Chile cheddar cheese or regular Cheddar cheese
Sour cream
Lime wedges

All you need for the chile verde sauce:
1 tablespoon canola oil
1 medium yellow onion, small dice
6 cloves garlic, minced
2 tablespoons flour
1/2 teaspoon ground cumin
Pinch of ground clove
1 teaspoon oregano
Salt and pepper to taste
3 tomatoes, peeled, seeded and chopped or 1 14 ounce can of diced tomatoes, drained
4 cups chicken stock
2 cups (about 1 pound) chopped, roasted and peeled Hatch Green Chiles (see note below)

All you do for the stew:
1. In a large pot, heat oil over medium high heat. Season pork with salt and pepper and brown on all sides. 
2. Add the chile verde sauce and turn down heat to low, cover and simmer pork for 2 hours (if using potatoes, add after 90 minutes).
3. Serve in bowls alongside the cheese, sour cream and lime. 
4. Enjoy!

All you do for the chile verde sauce:
1. In a medium sauce pan, saute the onion and garlic in the oil over medium-high heat for 3 minutes, until tender.
2. Stir in the flour, cumin, clove, salt and pepper and cook over medium heat, stirring, for 2 minutes.
3. Stir in the tomatoes, stock and chiles. Simmer for 15 minutes and puree until smooth.

*Note: Roast the peppers by placing them on an open gas flame, turning them frequently with tongs until all sides are charred black, about 7 to 10 minutes (alternately, the peppers can be roasted under a broiler or on top of a gas or charcoal grill). Place the blackened peppers in a plastic or paper bag and let rest until cool enough to handle, about 15 minutes. Peel the peppers and remove the seeds and stems. Chop the peppers and set aside.

As always, Praise the Lard!

-Chef Alex

Friday, August 4, 2017

Spaghetti ala Amatriciana


Hello my Hy-Vee friends!

I love pasta and let's face it, who doesn't? When our Hy-Vee brought in a new imported Italian section, I decided to give the Gustare pasta a shot and I was blown away. It's been too long since I ate real Italian pasta and I don’t think I’ll ever go back to the box stuff again. 

All pastas are NOT created equal. Yes, all pasta consists of flour and water, but the differences stop there. There is industrial pasta and artisan pasta. The two big differences are the dies they use to extrude the pasta and the time and temperature used to dry the pasta. 

Industrial pasta uses Teflon dies to extrude pasta. Teflon dies are strong, efficient and the pasta comes out shiny and smooth. But you do not want smooth pasta. With smooth pasta, the sauce slides off. Artisan pasta uses bronze dies. Bronze dies are expensive and break easier, but the pasta that is extruded comes out rough. Rough is what we want because then your sauce clings to the pasta. 

Secondly and just as important is how the pasta is dried. Industrial pasta is dried hot and quick. Artisan pasta is dried low and slow. This helps retain its delicious taste and texture. To highlight this wonderful pasta, I chose the delicious Amatriciana sauce. This pasta sauce is based on guanciale (cured pork jowl available at your Hy-Vee Deli), tomato, onions and garlic. Simple and very tasty!


Spaghetti ala Amatriciana

All you need:
1 tablespoon extra-virgin olive oil
1 medium onion, sliced thin
3 cloves garlic, sliced
1/4 pound guanciale, small dice (preferably La Quercia)
1 28 ounce can whole tomatoes
1/2 teaspoon red chili flakes, or to taste
Salt
1/4 cup grated aged pecorino cheese, more for serving
1 pound spaghetti

All you do:
1. Heat oil in a 12-inch skillet. Add onion and garlic, and saute over medium heat until transparent. Add guanciale and saute until barely beginning to brown.
2. Break up tomatoes and add. Cook about 15 minutes, crushing tomatoes with a spoon. Season with chili and salt. Remove from heat.
3. Bring a large pot of lightly salted water to a boil, add spaghetti and cook until al dente, about 9 minutes. Drain and transfer to skillet. Gently reheat contents of skillet, folding pasta and tomato sauce together until they are heated through and pasta is well-coated, about 5 minutes. Check seasoning and serve with cheese on the side. 
4. Enjoy!

Slurp some pasta and as always, Praise the Lard!

-Chef Alex

Thursday, July 6, 2017

Kimchi Noodles

Hello my Hy-Vee friends!

Full disclosureI love pasta salads. I never had them when I was kid (it was something simply not served by my French mother) but when I did have my first one, I still remember it. I was about 8 years old and it was served to me at my friend’s house. It was cool, creamy and studded with bacondelicious. When I inquired about it, my mom’s friend smiled and pulled out a box. It was Betty Crocker’s Suddenly Pasta Salad Ranch and Bacon.

Okay, so maybe my 8 year old palate wasn’t as refined as it is today. I still crave pasta salads but now my minds wanders to Asia. Korea specifically. On a blistering hot day, there is nothing better than a bowl of cold and spicy kimchi noodles. It is a little sweet, a little salty, a little sour, a lot spicythe perfect balance. While I still smile when I think about that boxed pasta salad I had many, many years ago, it's these kimchi noodles that truly make me content.


Kimchi Noodles

All you need:
1 cup finely chopped kimchi
1 medium garlic clove, minced
2 teaspoons grated ginger
2 tablespoons gochujang (Korean hot pepper paste)
1 tablespoon chili garlic paste
1 tablespoon sesame oil
1 tablespoon rice vinegar
8 ounces soba noodles
1 medium cucumber, peeled, halved and sliced into half-moons
3 or 4 large red radishes, sliced into thin rounds
1/2 cup scallions, slivered
2 tablespoons toasted sesame seeds
Cilantro sprigs or chopped cilantro, for garnish

All you do:
1. Put the kimchi, garlic, ginger, gochujang, chili garlic paste, sesame oil and rice vinegar in a mixing bowl. Stir well to combine.
2. Bring a large pot of generously salted water to a boil. Add noodles and cook for about 7 minutes, or until cooked through but still firm. Drain in a colander, run under cold water until cool and drain well.
3. Just before serving, put noodles in a large mixing bowl. Add the sauce, along with cucumber, radishes, scallions and toss gently to coat. Divide among individual serving bowls.
4. Top each bowl with sesame seeds and cilantro.
5. Enjoy!

Slurp some cold noodles and as always, Praise the Lard!

-Chef Alex

Thursday, June 22, 2017

Ottoman's Sherbet

Hello my Hy-Vee friends!

Let's face it. It's hot. And it won't cool down for another couple of months. This hot, muggy weather reminds of when I had the fortunate opportunity to visit Istanbul. It was love at first sight. The town had it all. Amazing food, nice people, a fascinating history and a mystery ready to be explored at every corner. But it was hot. And humid. And dusty. And there was no relief in my tiny hotel room which had an air conditioning unit the size of my cell phone.

One particularly hot, humid and dusty afternoon, I discovered a small stand that was selling something called "sherbets." Though there were a half dozen varieties, I pointed to one that had a deep ruby color. One sip and like the town itself I was once again in love. Like jumping into a pool for the first time, I was immersed in this cool, refreshing sensation. I didn't know it at the time but I was drinking history.

It turns out that around 1600, sherbets were all the rage. Since the rulers of the Ottoman Empire were Muslim, they were forbidden from drinking alcohol. As a result, the cooks of the palace were challenged to come up with drinks that would refresh without the kick of booze. The result were sherbets.

But I digress...back to the drink. It tasted like pomegranate, raspberries, blueberries, cherries and a hint of spice, but I could not figure out what else was in it. When I asked the vendor about the ingredients, he just smiled and shook his head. The recipe had been closely guarded for over 300 years and he certainly was not going to give it out to anyone, especially a very white, chubby tourist from Iowa.

I went back to that stand every day and while I tried all the different drinks, nothing compared to that glass of ruby nectar which I much later found was called Ottoman’s Sherbet. After lots of tinkering at home, I figured out a recipe that I will reluctantly share with you. While you may not be able to visit Istanbul, you can make this drink, get refreshed and have a small taste of Istanbul, a town that holds a very close place in my heart.


Ottoman's Sherbet

All you need:
1 64 ounce container cranberry pomegranate juice
2 cups of water
1 12 ounce bag Hy-Vee frozen cherry berry blend
3 cinnamon sticks
4 cloves
4 allspice berries
1 1-inch knob of ginger, roughly chopped
1/2 cup sugar

All you do:
1. Place all ingredients in a pot and bring to a boil. Turn down to a simmer and simmer for one hour.
2. Run the liquid through a strainer making sure to crush the berries.
3. Place in refrigerator until cool.
4. Enjoy! 

Drink up and as always, Praise the Lard!

-Chef Alex

Friday, June 9, 2017

Bahn Mi Sandwich

Hello my Hy-Vee friends!

It was a steamy summer night in Hanoi circa 1998. I was hungry and I knew that in a few hours I would be boarding an overnight train for a long, uncomfortable ride through the Vietnamese countryside. I was also aware that this would be my only opportunity to try a delicacy that had been on my radar for quite awhile.

With some in trepidation, I arrived at the restaurant and took a seat packed with Chinese businessmen. Within minutes, three bowls were placed in front of me. The dog had been prepared grilled, roasted and stewed. I tried them all and it was not a pleasant experience. Whether it was the taste or idea of eating a dog that upset me, I am no longer sure. I pushed the food aside, paid and quickly left.

Walking to the train station, I was hungrier than ever. Out of the corner of my eye, I saw a little bakery and decided to pop in. A woman behind the counter smiled and handed me a sandwich. I dug in and it was love at first bite. It was my first of many, many bahn mi sandwiches.


Bahn Mi Sandwich

All you need:
3/4 cup shredded carrots
1/2 cup shredded daikon radish
2 tablespoons unseasoned rice wine vinegar
2 tablespoons fish sauce
2 tablespoons sugar
1/4 teaspoon salt
1/2 cup mayonnaise
3 tablespoons sriracha sauce
1 pound roast pork, turkey or ham, thinly sliced
8 tablespoons liverwurst (delicious and authentic but optional)
4 six inch baguette split in half or 4 hoagie rolls
1 fresh jalapeno, thinly sliced
Cilantro leaves

All you do:
1. In a bowl, toss together the carrots, daikon, vinegar, fish sauce, sugar and salt and let stand at room temperature for at least 30 minutes.
2. Whisk together the mayonnaise and sriracha.
3. Divide the liverwurst and spread on the bottom of the sandwich (optional).
4. Divide the pork, turkey or ham between the four sandwiches.
5. Top with the pickled vegetables.
6. Add a few slices of jalapenos and a few sprigs of cilantro.
7. Spread the top slice of the sandwich with the mayo and place on the sandwich.
8. Enjoy!

As always, Praise the Lard!

-Chef Alex